
This guide combines two things you may already have tried: an SMS Gateway that sends messages over HTTP, and the Hello World Interface that serves a logged-in web page from a workflow.
Put together, they give you a small internal tool: a page where a user logs in, picks recipients from your Bosbec account, writes a message, and sends it as SMS. Everything is hosted by the workflow itself, so there is no separate web server to set up.
There is no dedicated SMS interface template in the Workflow Library. You will import the Hello World page first, keep its login and /index page, and then replace the page response with the SMS interface from this guide.
What you will build
One workflow exposing four endpoints on the same HTTP channel:
| Method | Path | Description |
|---|---|---|
GET |
/login |
Returns the login page from the Hello World template |
GET |
/index |
Returns the HTML interface |
GET |
/contacts |
Returns the units the user can send to |
POST |
/send-sms |
Sends the message |
Keeping all four on the same channel means the page and the API share a domain. That avoids CORS configuration entirely, and the token never has to travel to a third-party origin.
Before you start
- An HTTP channel. See Channels - Incoming.
- An API token for testing the endpoints outside the browser.
- A few units in your account with a phone number set. The POST Units guide covers creating them.
- The Bosbec: Hello World page workflow template. You will modify this workflow rather than create the interface endpoint from scratch.
- Familiarity with Building Your First API. This guide assumes you know how to add a trigger and a Send API Response job.
Step 1: Import the starting workflow
Open Workflow Builder and navigate to View > Workflow Library.
Under Tutorials, import Bosbec: Hello World page. This gives you the /login endpoint, token generation, and an /index page that already works from the browser.
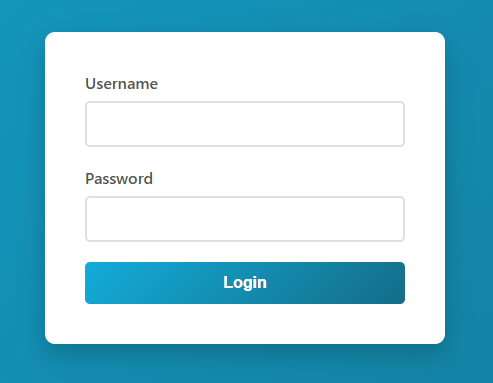
The login page should look similar to this before you replace the interface HTML:
If you created your account using the button on this page, you may already have selected this template when launching Workflow Builder and can skip this step.
Save and activate the workflow, then open the generated /index page once and confirm that the original Hello World interface can load units from your account. This is the baseline you will modify.
Step 2: Add the sending endpoint
Open the Workflow Library and import API2SMS HTTP-in, as described in SMS Gateway using HTTP-in.
Configure the trigger with your channel and the path send-sms. This gives you a working POST /send-sms endpoint that accepts:
{
    "sender": "Bosbec",
    "recipient": "+46700000001",
    "message_text": "Test message"
}
Verify it with an API client before you continue. If the request does not work from Postman, it will not work from the page either, and it is much easier to debug one layer at a time.
The imported workflow sends to one recipient per request. The interface below simply sends one request per selected recipient, which keeps the SMS workflow unchanged. If you later need to send to many recipients at once, extend the workflow with a For Each Resource loop over a recipient array instead.
Step 3: Change the unit response for contacts
The Hello World workflow already contains a unit lookup used by its example page. Reuse that part for the recipient list instead of building a separate unit lookup from scratch.
Add or modify a GET endpoint on the same channel with the path contacts. It should use the same authentication and unit lookup pattern as the Hello World page, but return the fields the SMS interface needs.
In the existing unit lookup, make these changes:
- Change the trigger path for the unit list to
contacts, so it matches the/contactscall in the HTML. - Increase the page size in the Find units step so the page can show more than the small Hello World sample.
- Filter out units that do not have a phone number.
- Update the JSON Pipeline so each unit is shaped into the object below.
- Keep the Send API Response job returning
200 OKwith the JSON.
Return only what the interface needs:
[
	{
		"id": "00000000-0000-0000-0000-000000000000",
		"name": "John Doe",
		"phone": "+46700000001"
	}
]
Units without a phone number cannot receive an SMS, so filter them out in the pipeline rather than in the browser. The list the page receives should be the list the user is allowed to act on.
Step 4: Replace the Hello World page
Find the Send API Response job that returns the Hello World HTML for the existing /index page. Keep the trigger, login redirect, and token generation from the template, but replace the HTML response body with the interface in the next step.
The response should still use:
- Status code: 200
- Content type:
text/html - Body: the HTML from the next step
This keeps the page on the same URL structure as the imported template. Because the page is served from your Bosbec channel, its fetch calls to /contacts and /send-sms are same-origin requests.
One thing to watch out for: the response body is processed for Bosbec variables, so any literal {{ in your HTML or JavaScript will be interpreted as a variable reference. Avoid double curly braces in the page, or keep the affected code in a separate file that the page loads.
Step 5: The interface
Paste this into the Send API Response body. It is intentionally plain - one select, one textarea, one button.
<!doctype html>
<html lang="en">
<head>
  <meta charset="utf-8">
  <meta name="viewport" content="width=device-width, initial-scale=1">
  <title>Send SMS</title>
  <style>
    body { font-family: system-ui, sans-serif; max-width: 40rem; margin: 2rem auto; padding: 0 1rem; }
    label { display: block; margin: 1rem 0 0.25rem; font-weight: 600; }
    select, textarea, button { width: 100%; padding: 0.5rem; font: inherit; }
    #status { margin-top: 1rem; }
  </style>
</head>
<body>
  <h1>Send SMS</h1>

  <label for="recipients">Recipients</label>
  <select id="recipients" multiple size="8"></select>

  <label for="message">Message</label>
  <textarea id="message" rows="4" maxlength="459"></textarea>
  <small id="count">0 characters</small>

  <p><button id="send">Send</button></p>
  <div id="status" role="status"></div>

  <script>
    const params = new URLSearchParams(window.location.search);
    const urlToken = params.get('authorization');
    if (urlToken) {
      sessionStorage.setItem('bosbec_token', urlToken);
      params.delete('authorization');
      const cleanUrl = window.location.pathname + (params.toString() ? '?' + params.toString() : '');
      window.history.replaceState({}, document.title, cleanUrl);
    }

    const token = sessionStorage.getItem('bosbec_token');
    const headers = { 'Authorization': token, 'Content-Type': 'application/json' };
    const status = document.getElementById('status');
    const message = document.getElementById('message');
    const recipients = document.getElementById('recipients');

    message.addEventListener('input', () => {
      document.getElementById('count').textContent = message.value.length + ' characters';
    });

    async function loadContacts() {
      const res = await fetch('/contacts', { headers });
      if (!res.ok) { status.textContent = 'Could not load contacts.'; return; }
      for (const c of await res.json()) {
        const option = new Option(c.name + ' (' + c.phone + ')', c.phone);
        recipients.add(option);
      }
    }

    document.getElementById('send').addEventListener('click', async () => {
      const selected = [...recipients.selectedOptions].map(o => o.value);
      if (!selected.length || !message.value.trim()) {
        status.textContent = 'Select at least one recipient and write a message.';
        return;
      }

      status.textContent = 'Sending...';
      const results = await Promise.all(selected.map(phone =>
        fetch('/send-sms', {
          method: 'POST',
          headers,
          body: JSON.stringify({ sender: 'Bosbec', recipient: phone, message_text: message.value })
        })
      ));

      const failed = results.filter(r => !r.ok).length;
      status.textContent = failed
        ? failed + ' of ' + results.length + ' messages failed.'
        : 'Sent ' + results.length + ' message(s).';
    });

    if (token) {
      loadContacts();
    } else {
      status.textContent = 'Log in before loading contacts.';
    }
  </script>
</body>
</html>
The page reads the authorization value added by the Hello World login redirect, stores it in sessionStorage, and then uses that token for /contacts and /send-sms. Nothing about the message or the recipients is hard-coded in the workflow.
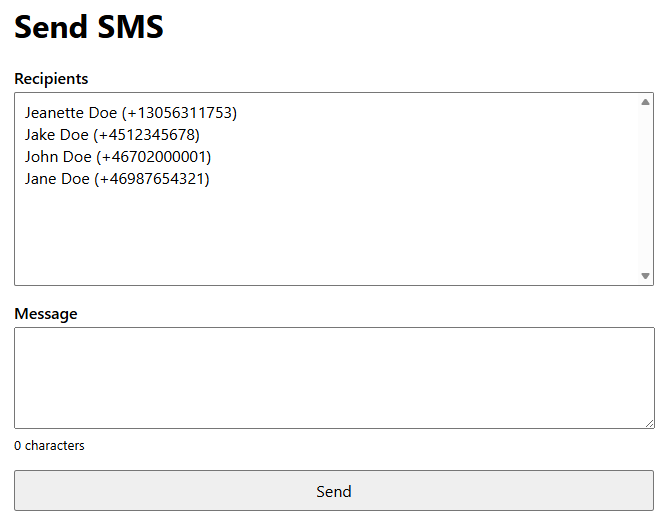
When the /contacts endpoint returns units with phone numbers, the interface should look similar to this:
Make it look like your own tool
The markup above is deliberately unstyled so the logic is easy to follow, but this is an internal tool that you and your colleagues may use every day, and it is worth making it look like it belongs to you.
Everything you need sits in the <style> block:
- Swap the colours for your brand palette, and use your accent colour for the send button.
- Point
font-familyat your corporate typeface, with a system font as fallback. - Add your logo above the heading with an
<img>tag referencing a hosted image.
If you prefer not to write the CSS yourself, paste the HTML into a local file and let an AI assistant restyle it against your brand guidelines, as described in Hello World Interface. Then paste the result back into the Send API Response job. Keep the element IDs unchanged, since the JavaScript looks them up by ID, and remember to avoid double curly braces in anything you paste back.
Step 6: Authentication
Do not put an account API token in the HTML. Anyone who opens the page can read it in the browser.
The imported Hello World Interface already includes the /login pattern you need:
- A
POSTendpoint that takes the user's Bosbec credentials. - The workflow authenticates the user and generates a token for that user.
- The
/indexpage receives the token in theauthorizationquery parameter, stores it insessionStorage, and sends it in theAuthorizationheader, as the code above does.
Because the token belongs to the logged-in user rather than the account, revoking access is a matter of disabling the user.
Step 7: Test it
- Save and make sure the workflow is active.
- Open
https://yoursubdomain.in.bosbec.io/indexin a browser. - Log in, and confirm that the recipient list is populated.
- Select yourself, send a short message, and check that it arrives.
If something does not work, open the browser's developer tools and look at the network tab before you open the workflow. The status code tells you which layer failed.
| Status | Likely cause |
|---|---|
503 |
The workflow is not activated, or no trigger matches the method used |
401 |
The token is missing or expired - check what sessionStorage actually contains |
500 |
The workflow started but a job failed. See Troubleshooting your workflow |
An empty recipient list with a 200 response usually means the Find units step matched nothing, or the JSON Pipeline produced a different shape than the page expects.
Next steps
The same three-endpoint structure works for most small internal tools. Once the SMS interface works, useful extensions include:
- Sending to a group instead of individual units.
- Adding a search field, backed by a query parameter on
/contactsas shown in GET Units from HTTP-in. - Logging each message to a resource so the page can show a history.
- Letting an AI assistant iterate on the interface, as described in Working with Bosbec and AI.