Time to complete: 10-15 minutes
Goal: Create an API token, import a ready-made workflow, and send your first successful POST request.
This guide walks you through creating a unit in Bosbec using the POST Units workflow template.
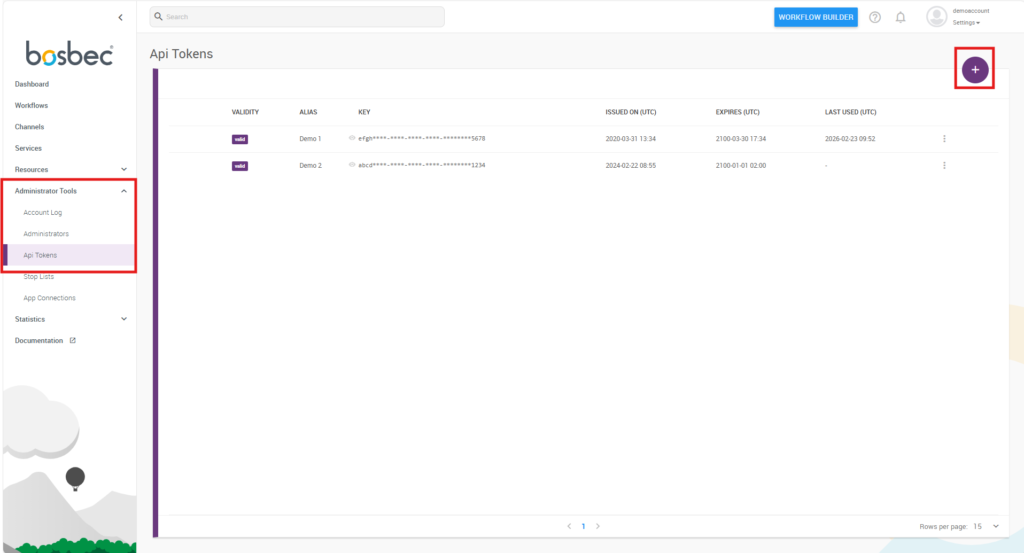
Step 1: Create Your API Token
- Log in to Bosbec.
- Go to Administrator Tools in the main navigation menu.
- Select API Tokens.
- Click the purple plus (+) icon in the top right.
- Click the key once to reveal it, and twice to copy it.
Store the API token securely. It provides authenticated access to your Bosbec environment and should not be exposed in client-side code or shared publicly.
Step 2: Import the API Workflow
- Click the blue Getting Started button in the top right to open the Workflow Builder.
- In the left panel, click Workflow Library.
- Select Bosbec: API – POST Units.
- Click Import.
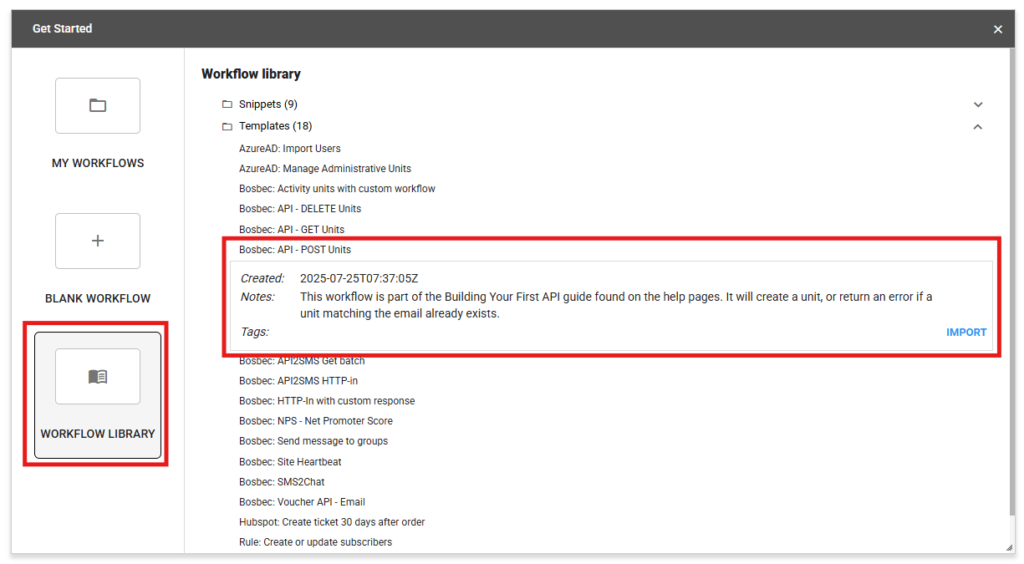
This imports a preconfigured workflow that lets you create units.
Step 3: Configure and Activate the Trigger
- Double-click the POST Units trigger.
- Click Choose channels.
- Click Add channel.
- Enter a name for the channel.
- Scroll down and click Save changes.
- Select your newly created channel in the list on the right.
- In the top left, open File → click Save (Ctrl+S, ⌘+S).
- In the top-right corner, click the gray toggle to turn it yellow (this activates the workflow).
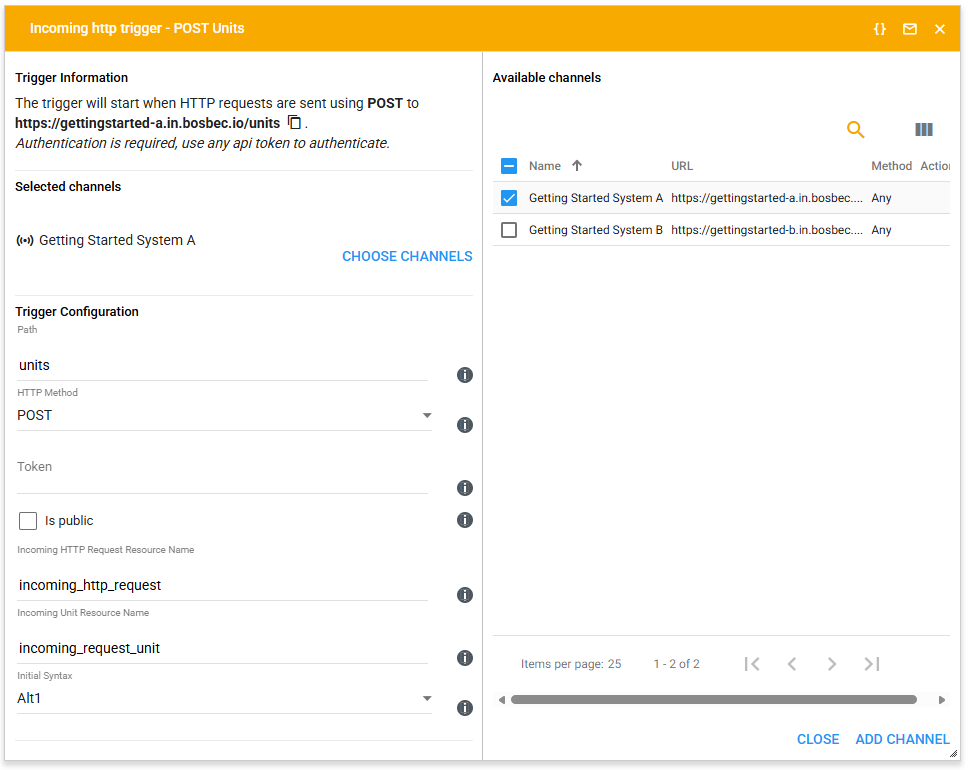
The workflow must be activated before it can receive API requests.
Step 4: Send Your First API Request
Use an API client such as Postman or any HTTP client of your choice. You can then either copy and paste the cURL below, or follow the steps to build the request manually.
curl -X POST https://example.in.bosbec.io/units \
  -H "Authorization: YOUR_API_TOKEN" \
  -H "Content-Type: application/json" \
  -d '{
    "firstname": "John",
    "lastname": "Doe",
    "email": "john@doe.com",
    "phone": "+46702000001"
}'
Copy cURL
Remember to replace the api key and the subdomain in the URL if you copy the cURL.
1. Prepare the request
- Copy the URL from the POST Units trigger.
- Set method to:
POST - Paste the URL into your API client.

2. Add Authentication Header
Add a request header:
Authorization: YOUR_API_TOKEN
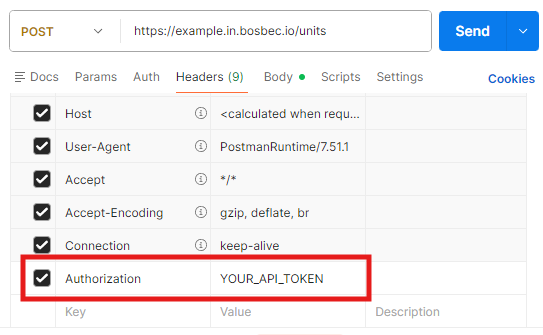
Replace YOUR_API_TOKEN with the token you created earlier.
3. Add Request Body (JSON)
{
  "firstname": "John",
  "lastname": "Doe",
  "email": "john@doe.com",
  "phone": "+46702000001"
}

Make sure:
- The body format is set to raw JSON
- The request method is POST
4. Send the request
Click Send.
Step 5: Review the Response
If everything is configured correctly, you will receive:
HTTP Status: 200 OK
Example response:
{
  "id": "eea969da-d97e-463a-a537-c67940c6077c",
  "firstname": "John",
  "lastname": "Doe",
  "email": "john@doe.com",
  "phone": "+46702000001"
}
The response contains the created unit with its unique id.
Common Error Codes
When things aren’t going as planned, there are ways to troubleshoot your workflow. Below follows some of the more common error codes you might get when performing tests on your new endpoint.
503 – Channel accepted, but no matching triggers found
Possible causes:
- The workflow is not activated.
- The API token is incorrect.
- The request is sent to the wrong channel.
404 – No channel found matching the request
Possible causes:
- The channel was not created.
- The URL does not match the configured trigger.
409 – Conflict
This is intentionally configured in the workflow. It is returned if a unit with the same email already exists.
Next Steps
For a deeper explanation of channels and additional workflow examples using different HTTP methods:
For a broader integration guide covering design principles and integration strategy: