In this guide, we’ll create an endpoint that creates a unit based on the body of a POST request. The below is an example of the request used to call the API.
curl --location 'https://example.in.bosbec.io/units' \
--header 'Authorization: 00000000-0000-0000-0000-000000000000' \
--header 'Content-Type: application/json' \
--data-raw '{
    "firstname": "John",
    "lastname": "Doe",
    "email": "john@doe.com",
    "phone": "+46702000001"
}'
The returned data will be formatted as below.
{
	"id": "00000000-0000-0000-0000-000000000000"
	"firstname": "John",
	"lastname": "Doe",
	"email": "john@doe.com",
	"phone": "+46700000001"
}
Start off by:
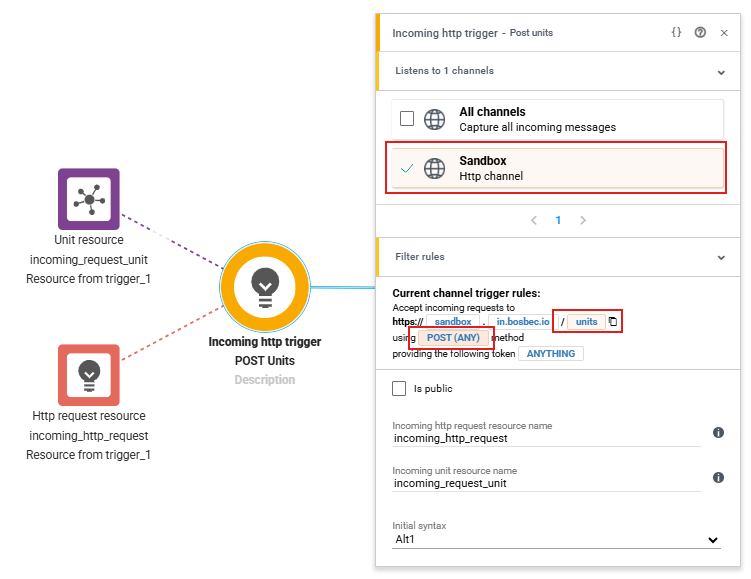
- Adding an Incoming HTTP trigger
- Selecting the channel you created.
- Adding the path “units” to the end of the URL.
- Selecting the POST method.
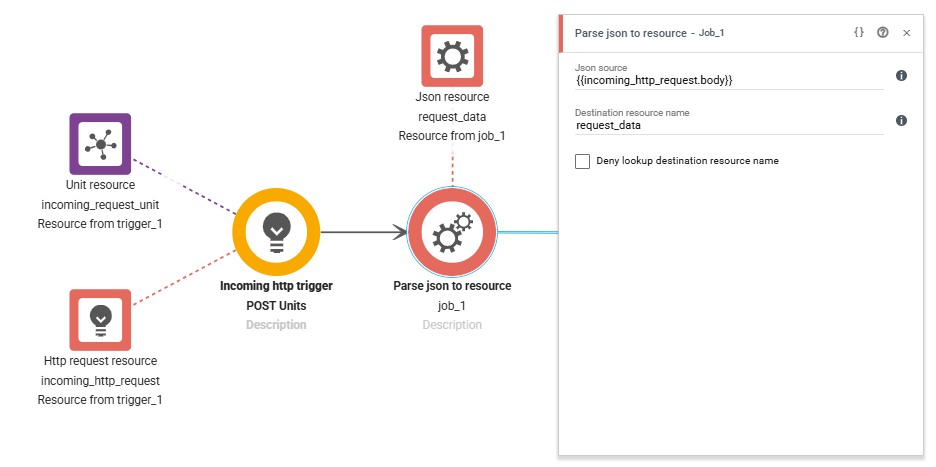
Next, add a Parse JSON to Resource job and
- Get the incoming request data by setting JSON source to:
- {{incoming_http_request.body}}
- Save the JSON as a resource.
- In this case, we’ve named it ‘request_data’, but you can choose a different name. Just make sure you reference this later.
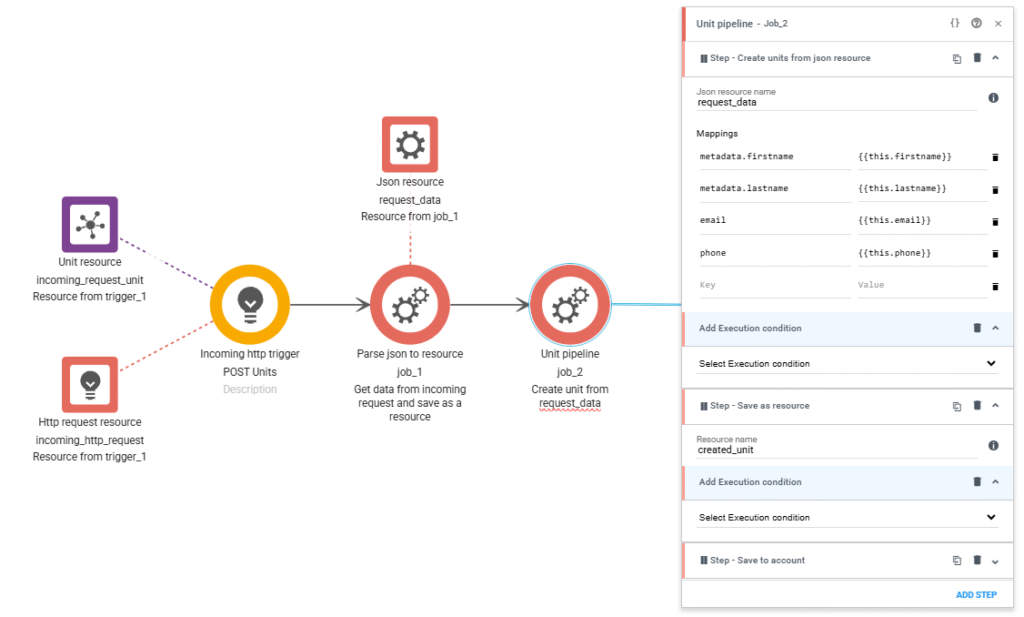
Following this, we can now create the unit by adding a Unit Pipeline.
- Add a create units from JSON resource step
- Set the JSON resource name to ‘request_data‘.
- In the mappings, add the following keys:
- metadata.firstname
- metadata.lastname
- phone
- Next, save it as a resource by adding a “Save as resource” step and name it created_unit.
- Finally, save the unit to the account by adding a “Save to account” step.
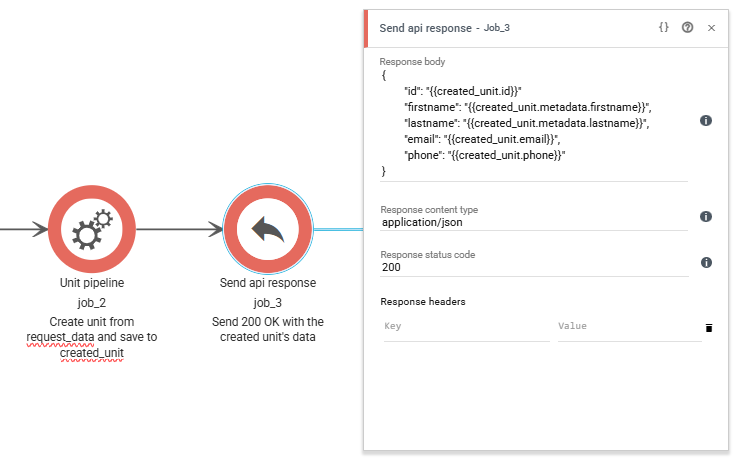
Technically, we have reached our goal of creating a unit using a POST request now, but we should report back to the requester that everything went as expected. This can be done using a Send API Response job.
Use the JSON structure below to create the response that we defined at the beginning of the article.
{
	"id": "{{created_unit.id}}"
	"firstname": "{{created_unit.metadata.firstname}}",
	"lastname": "{{created_unit.metadata.lastname}}",
	"email": "{{created_unit.email}}",
	"phone": "{{created_unit.phone}}"
}
You now have an endpoint for creating units!
Preventing duplicates
While the previous steps will do the job, you usually want to make sure that duplicates are not created. For instance, it is common that a system is using the email address as a unique identifier and it would be good if we could stop the requests if the resource already exists on the account.
As always, there’s a number of ways to do this, but in this article we’ll show how we usually build it.
Between the Parse JSON to Resource job and the Unit Pipeline, add another Unit Pipeline. Configure it like this:
- Find units step
- Matches email
- Address
- {{request_data.email}}
- Page size
- 1
- Address
- From account
- Matches email
- Save as resource step
- Resources name
- found_unit
- Resources name
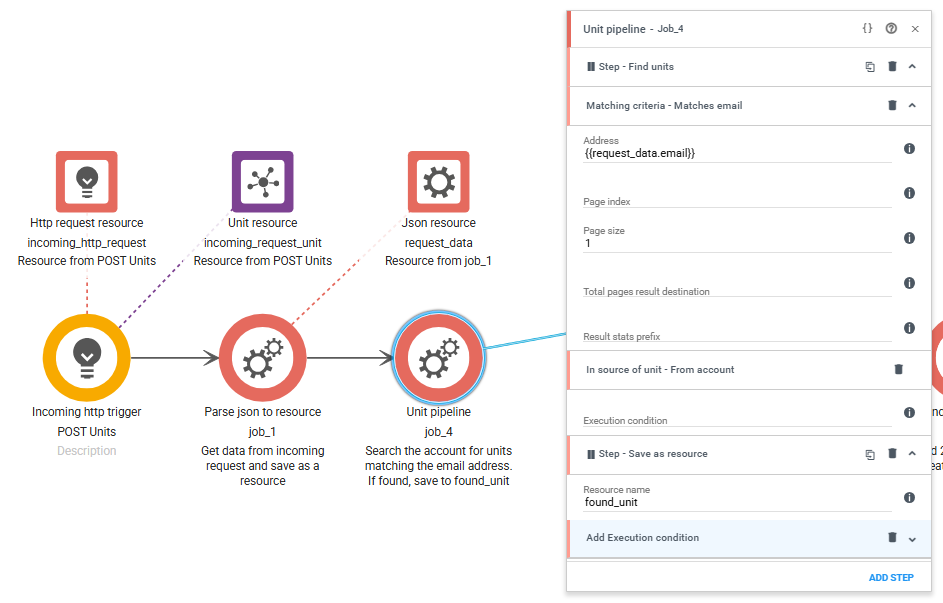
This will search your account for units matching the email, making sure it can only match one. Then saving it to a resource that we can count in the next step.
Next up, add a Route from meta data job and drag an arrow to the Unit Pipeline we created in the first part of the guide. Configure it like this:
- Meta data source
- {{found_unit.count()}}
- Compare operator
- =
- Compare value
- 0
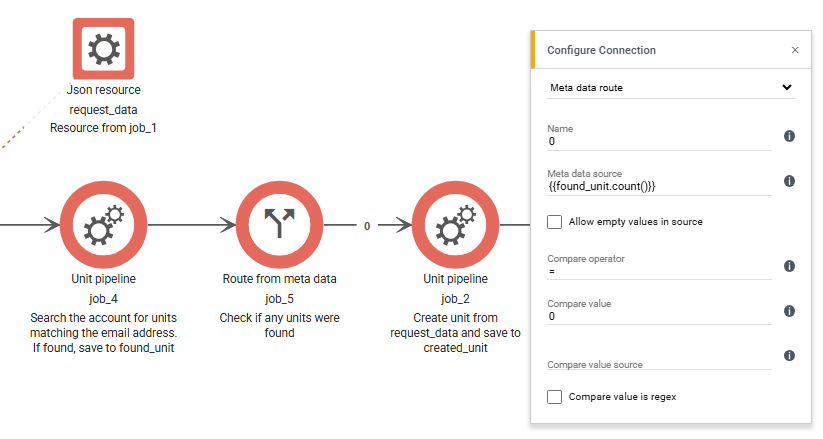
Now, the process will only continue to creating a unit if no units were found matching the email.
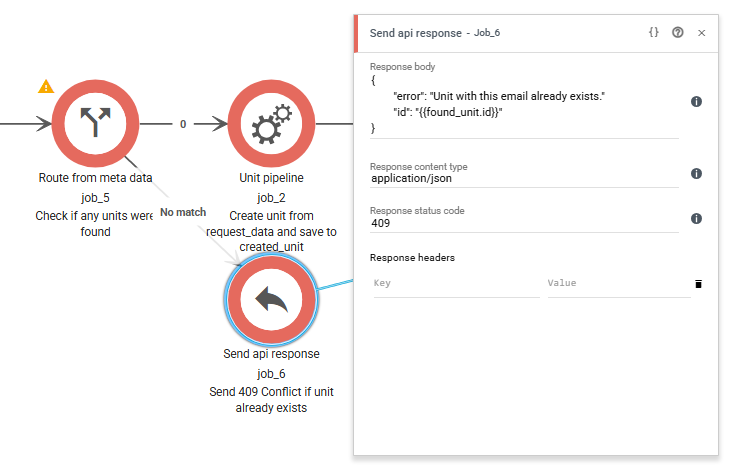
The final step is to add a response to the request if it fails. We do this by adding another Send API Response with the following content:
This is what the entire workflow looks like when finished!
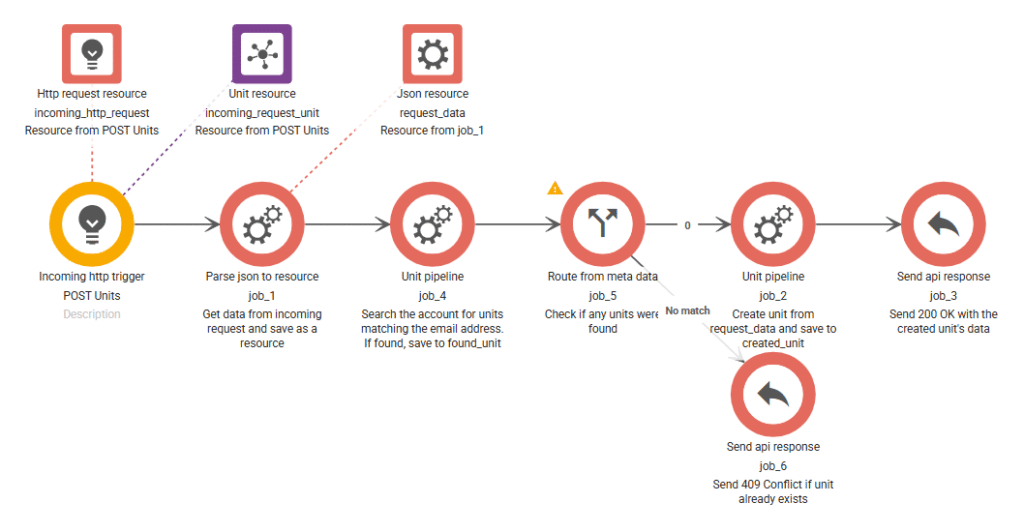
This can be modified to use the phone as the identifier, check both email or phone, or add more data to the unit. This version of the workflow can also be found in the Workflow Library!