We have created an example workflow that demonstrates how you can use MCP (Model Context Protocol) to query information stored in your Bosbec account. In this example, the workflow retrieves call history from a phone system, but the same principle can be applied to many other types of data and integrations.
The workflow also includes a flow that generates dummy data, allowing you to test the entire process before connecting your actual phone system. By mapping incoming data from your phone system to the same fields used by the dummy data, you can easily transition to live data once you have collected the information required to establish the integration.
In this guide, we will show you how to create and configure the workflow, and how to connect your AI agent, Claude in this example, to your MCP server.
Importing the Workflow
Start by opening the Workflow Builder and navigating to View → Workflow Library in the menu at the top left.
Under Tutorials, you will find the template named “Bosbec: MCP Call Log”. If you created your account using the button on this page, you may already have selected this template when launching Workflow Builder and can skip this step.
Open the “/mcp” trigger in the main workflow. Create a channel if you have not already done so, then save the workflow.
Under the trigger information, you will now see your endpoint URL. It will look similar to:
https://{subdomain}.in.bosbec.io/mcpActivate the workflow by enabling the toggle in the upper-right corner.
Creating Test Data
Run the “Create dummy data” trigger by right-clicking the trigger and selecting Start Trigger.
In the dialog that appears, click Run.
This will create units representing:
- 5 incoming calls
- 5 outgoing calls
- 5 missed calls
for a total of 15 sample call records.
Connecting Claude to Your MCP Server
Copy your endpoint URL and add it as a Custom Connector in Claude.
You can find detailed instructions here: Claude – Get started with custom connectors using remote MCP
Once connected, you are ready to start asking questions in the chat.
For example:
- “Do I have any missed calls today?”
- “Which agents answered the most calls today?”
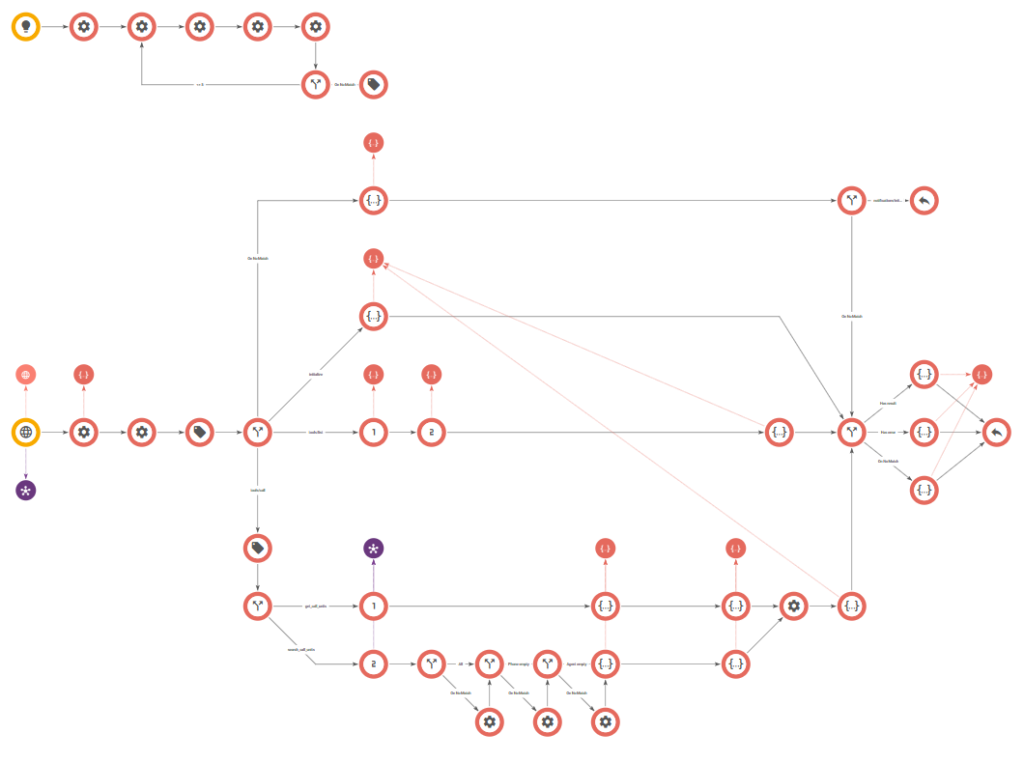
Understanding the Workflow
Now that the workflow is up and running, let’s take a closer look at how it works and how you can extend it with additional tools for your AI agent.
tools/call
The example workflow includes two search tools:
get_call_unitssearch_call_units
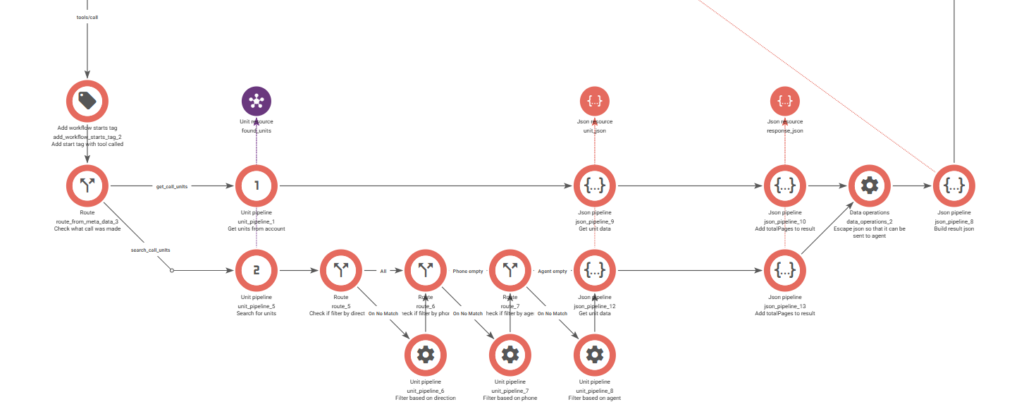
get_call_units
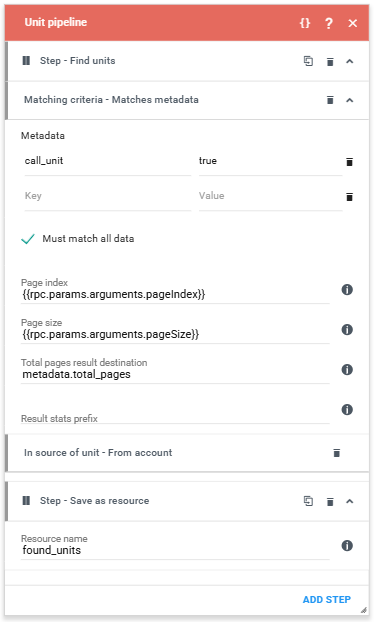
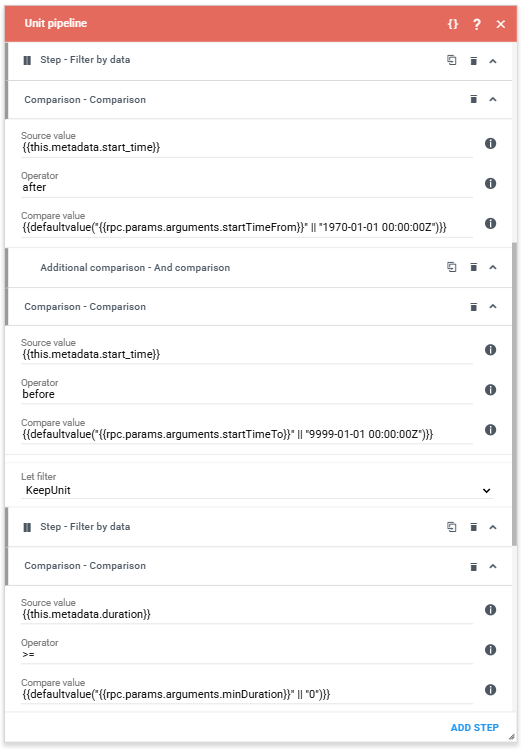
The get_call_units flow performs a basic search for call units stored in the account.
A Unit Pipeline job retrieves the matching units using paging parameters. The job stores all matching units in a resource called found_units and records the total number of available pages in metadata.
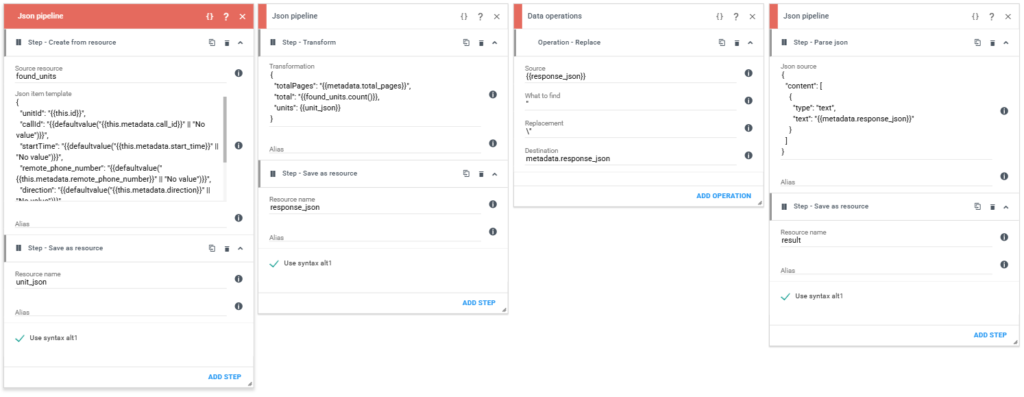
The following JSON Pipeline job builds a JSON resource containing information from each call unit, such as:
- Call ID
- Start time
- Call duration
- Agent
- Additional call-related information
Once the data has been collected, it is wrapped in a higher-level JSON structure that also includes:
totalPages- Total number of matching calls
The result is escaped, placed into a content body, and returned to the MCP server.
search_call_units
The search_call_units flow follows the same overall structure but exposes additional parameters that allow the AI agent to search for specific calls.
Examples include filtering by:
- Call ID
- Date and time ranges
- Other call-specific criteria
This enables more targeted searches and analysis of call data.
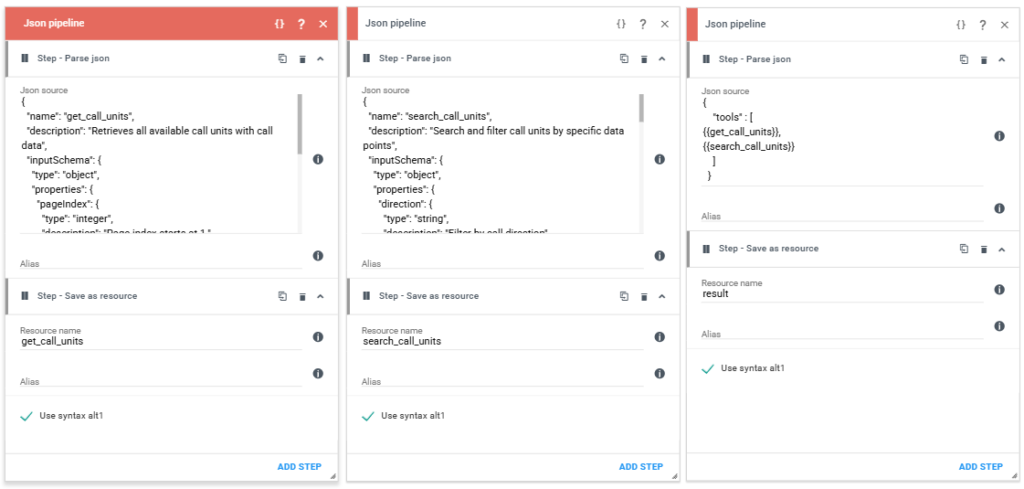
tools/list
For the MCP server to expose the available tools, it must provide a list of supported tool definitions and their parameters.
This is handled by the workflow in the middle section.

Three JSON Pipelines are used to construct this list:
- A pipeline defining the first tool and its parameters.
- A pipeline defining the second tool and its parameters.
- A pipeline that combines all tool definitions into a single list.
Adding Your Own Tools
To provide your AI agent with additional capabilities, you will need to:
- Add a new route that performs the desired search or action.
- Create a new JSON Pipeline that defines the tool and its parameters.
- Include the new tool definition in the combined tools list.
If you want to change the tools, but you are unsure of what to write in the JSON, you can simply ask Claude! Copy and paste the inputSchema, then ask what changes are needed to enter the data you require in your tool.
This is where you can get creative! You can build tools that search data stored in your Bosbec account, retrieve information from external systems, perform calculations, or expose entirely new capabilities that your AI agent can use through MCP.
If you have any questions or if you need help, don’t hesitate to contact us in the Support Team using the help center in the platform or the contact form here in the help pages!