The Send HTTP Request job is the latest version of the job used to send outbound HTTP requests from Bosbec. This article explains how it works and how to configure it to communicate with external systems.
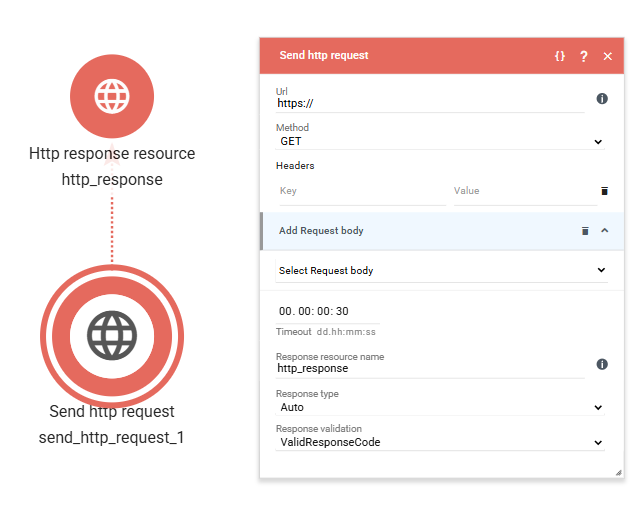
When you drag the job into the workspace for the first time, both a job and an HTTP response resource are created automatically. You may rename the HTTP response resource to something more descriptive, such as customers_response. By default, it is named http_response.
Properties
The job contains several configurable properties. Below is a complete list of all available fields and their respective settings.
Note that these fields do not need to contain static values. Dynamic data can be inserted using the standard Bosbec syntax (e.g., {{metadata.customerId}}).
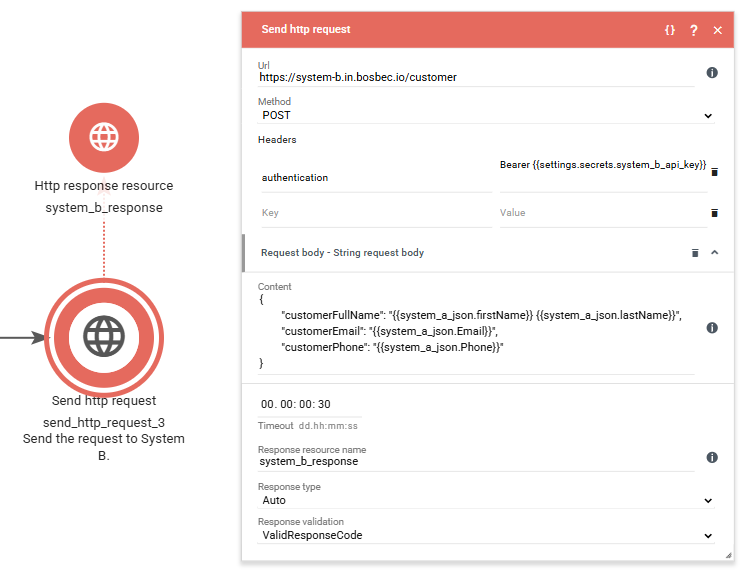
1. URL
Specify the endpoint of the external system you want to call.
Any required query parameters should also be included here.
Example:
https://system-a.in.bosbec.io/customers?id={{metadata.customerId}}2. Method
This field is a dropdown menu with five available HTTP methods:
- GET
- POST
- PUT
- PATCH
- DELETE
Select the method appropriate for the target endpoint.
3. Headers
Headers are configured using key/value pairs:
- The left field contains the header name (key)
- The right field contains the header value
This is typically where you define values such as:
- Content-Type: application/json
- Authorization headers
- Custom API headers
4. Request Body
This property allows you to select one of three request body types:
- Byte array
- Multipart
- String
In most cases, String is used. When selected, a textarea labeled Content appears, where you can insert:
- JSON
- XML
{{}}references to dynamic data generated earlier in the workflow- Other formats
5. Timeout
The request timeout is configured using a four-part input field.
The format is:
dd.HH:mm:ssWhere:
dd= daysHH= hoursmm= minutesss= seconds
6. Response Resource Name
This field defines the name of the response resource that will store the result of the HTTP request.
By default, the value is http_response. However, it is recommended to rename this to a more descriptive name that reflects the request’s purpose. This improves readability, especially in larger workflows with multiple HTTP calls.
7. Response Type
This dropdown contains four options:
- Auto
- Text
- JSON
- XML
In most cases, Auto is sufficient, as it automatically interprets the response and selects the appropriate type.
However, there may be cases where you want to explicitly enforce a specific response type. This setting is also relevant in combination with the next property.
8. Response Validation
This dropdown determines what should be considered a successful response and therefore which outgoing workflow path will be triggered.
The available options are:
- Valid Response Code
- Valid Response Code and Response Type
- No Validation
Valid Response Code
Requires a 2XX HTTP status code for the request to be considered successful.
Valid Response Code and Response Type
Requires both a 2XX status code and that the response content matches the selected response type.
No Validation
All responses are treated as successful, regardless of status code or content.