When importing units in the admin platform, you can choose to import them one by one or by pasting multiple rows of data at once to import many units simultaneously.
First, select whether to import a single unit or multiple units as shown in the image below.
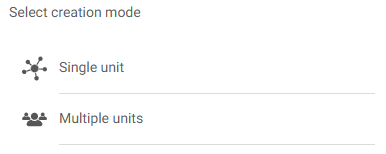
Single unit
Selecting “Single unit” presents you with a few fields for different values. These include type, alias, channels, metadata, and tags.
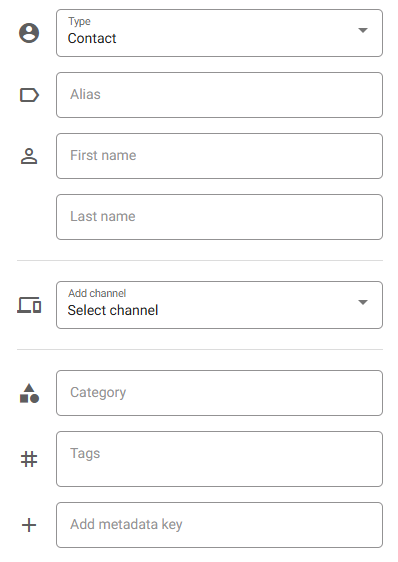
While you can select either ‘contact’ or ‘data’ in the type field, both options will create a standard unit. The purpose of this option is to make it easier to add a name and contact channels when using the unit as a receiver by presenting a few extra fields (first name, last name, and add channel).
Adding a first name or last name will simply create a metadata key called “firstname” or “lastname” and save the value there, commonly used in standardized Bosbec services.

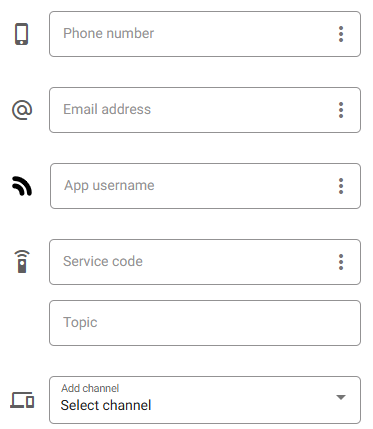
When adding channels, you can choose between Phone number, Email address, App, or MQTT.
Adding a category will allow you to filter units based on the entered value.
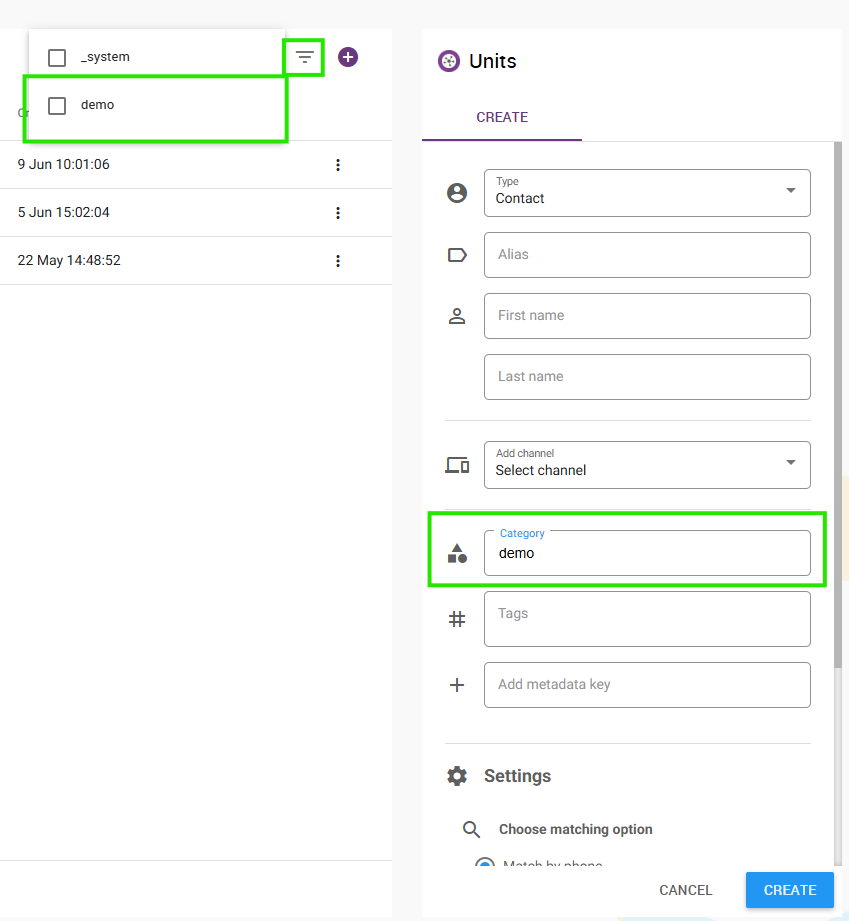
When adding metadata to the unit, you will first click the “add metadata key” field and enter the key you want to add.

Follow that by pressing Enter to confirm and write the value you want to add.

When you’ve entered the data you want to add to the unit, press “CREATE” to confirm and create the unit.

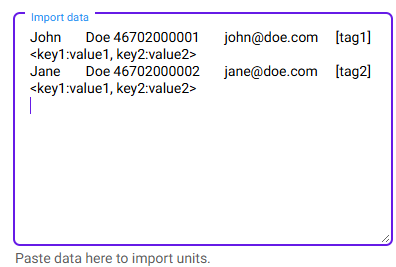
Multiple units
If you have multiple units that need to be added, you can use the “Multiple units” option instead. This will present you with a textarea in which you can write or paste the data.
Each new row will create a unit with the data from the row and follow the format shown in the placeholder text.
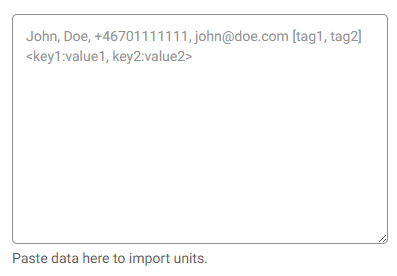
However, while the placeholder only displays a CSV format, you can also paste it from Excel with tab separators instead of commas.
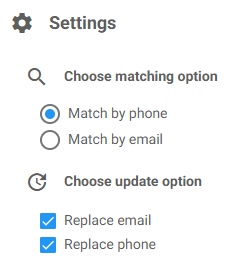
Settings
Both import variants have the same settings options. You can choose to match existing units by phone or email, and you can decide what to do with the other if a match is found.
For instance, if you match by phone, but don’t want to replace an existing email address, you can uncheck the “replace email” option. If you want to make sure that the email address is updated when a match is found, check the “replace email”. The same goes for the phone field.